This step by step diy project is about 6 foot picnic picnic table plans plans. I have designed this outdoor picnic table with a traditional look, so you can save money, have fun and add value to your home. If you have a recreation area or a bbq in your backyard, this project is a must have addition. Take a look over the rest of my woodworking plans, if you want to get more building inspiration. Premium Plans available for this project in the Shop (not identical, improved version).
You should remember that all my woodworking plans come with 3D diagrams, step by step instructions and complete Cut and Shopping lists. Inn addition, you can Print or PDF download the plans for free, so you can take the plans with you in the shop. I did my job, now it is your turn to build amazing pieces of furniture!
When buying the lumber, you should select the planks with great care, making sure they are straight and without any visible flaws (cracks, knots, twists, decay). Investing in cedar or other weather resistant lumber is a good idea, as it will pay off on the long run. Use a spirit level to plumb and align the components, before inserting the galvanized screws, otherwise the project won’t have a symmetrical look. If you have all the materials and tools required for the project, you could get the job done in about a day. See all my Premium Plans HERE.

One day
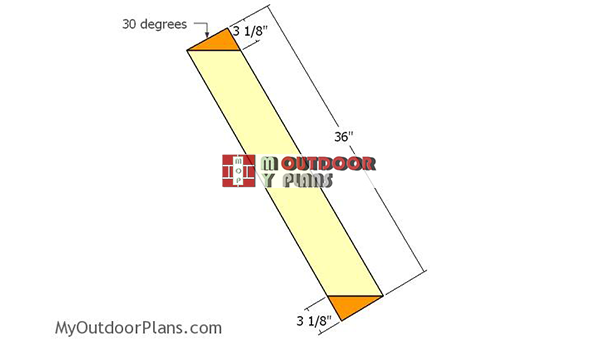
The first step of the outdoor project is to build the legs for the 6′ picnic table. As you can easily see in the diagram, you need to make 30 degree cuts to both ends of the 2×6 legs. Smooth the edges with sandpaper.

Next, you need to build the tabletop supports from 2×4 lumber. Make 45 degree cuts to both ends of the supports, following the diagram. Moreover, drill pocket holes into the 2×4 supports, so you can lock it to the tabletop slats.
Assembling the tabletop
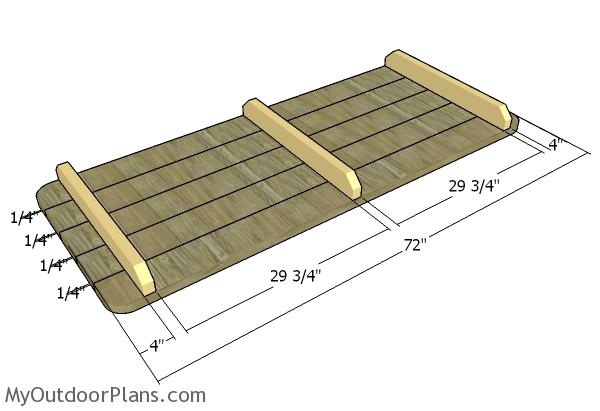
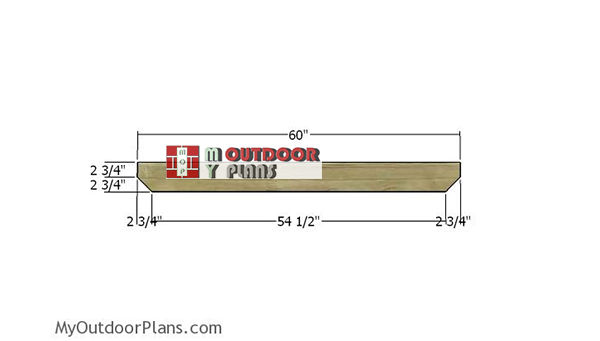
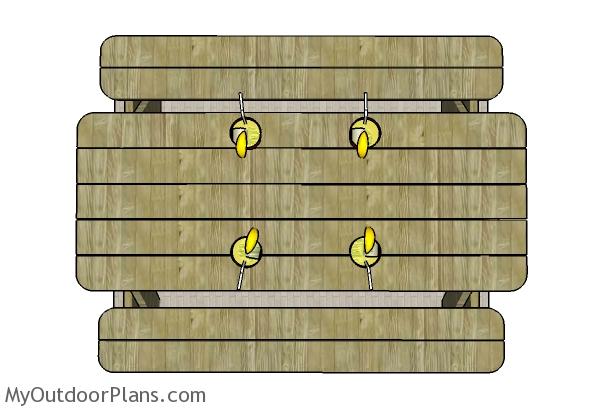
Lay the 2×6 tabletop slats on a level surface. Place 1/4″ plywood pieces between the slats so you can create even gaps. Fit the supports to the slats and then place them equally spaced. Insert 2 1/2″ screws to secure the supports into place tightly.
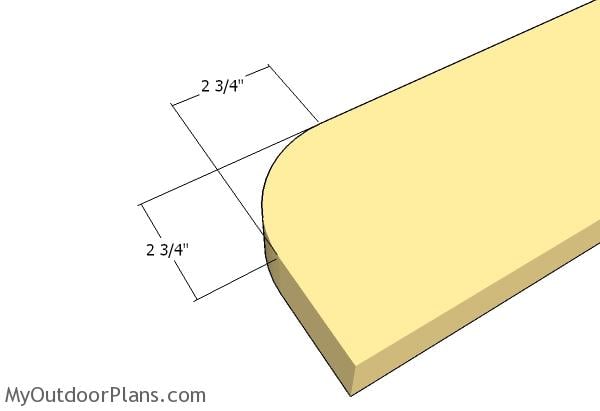
Use a jigsaw to make round decorative cuts to the corners of the tabletop.
Fitting the supports
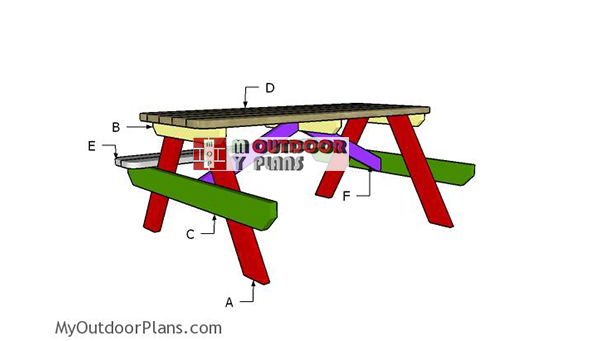
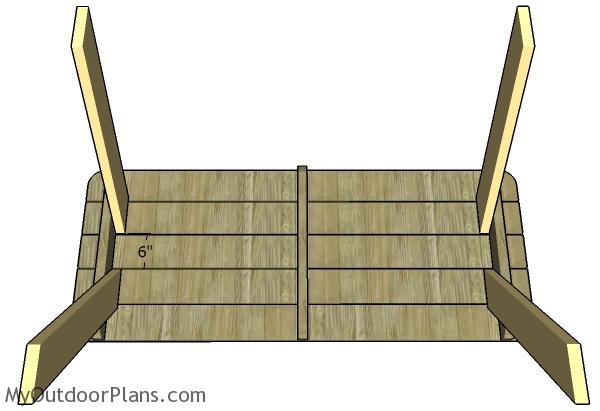
Fit the 2×6 legs to the picnic table, as shown in the diagram. Clamp the legs to the supports and then drill pilot holes through both components. Insert 3 1/2″ carriage bolts and tighten the components into place. Use two bolts for each joint for a professional result. Using the carriage bolts will also make disassembling the picnic table easy, if you want to move it to another location.
Build the seat supports from 2×6 lumber. Make 45 degree cuts to both ends of the supports, as shown in the plans.
Fitting the seat supports
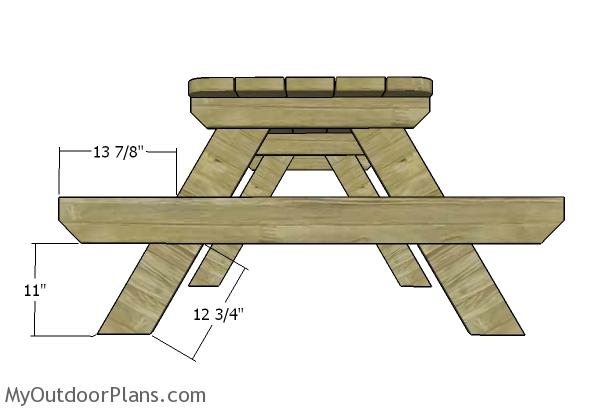
Align the seat supports to the legs and then clamp them into place tightly. Drill two pilot holes through the braces and through the legs, for each joint. Insert 3 1/2″ carriage bolts to lock the components together tightly. Use a spirit level to plumb the seat supports horizontally.
Building the diagonal braces
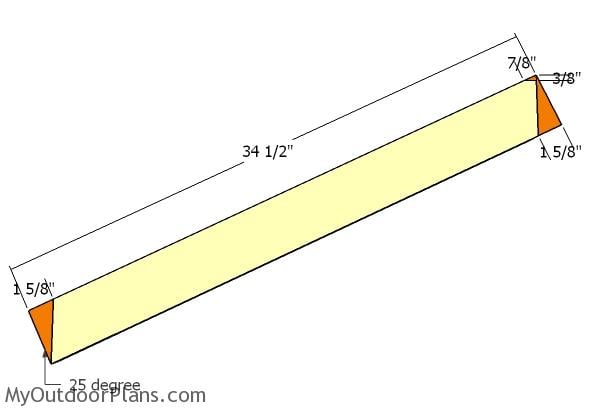
Build the braces for the table from 2×4 lumber. Make 25 degree cuts to both ends of the diagonal braces and then get the job done with another small cut to the top end.
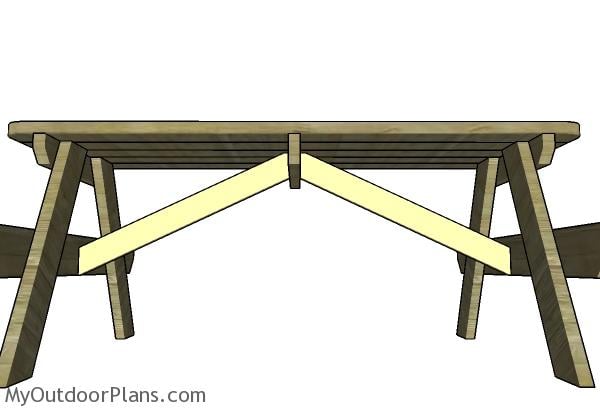
Fitting the braces
Fit the diagonal braces to the picnic table, making sure the corners are square. Use a spirit level to plumb the legs and to check if the top is horizontal. Drill pilot holes and insert 2 1/2″ screws to lock the braces to the frame of the picnic table.
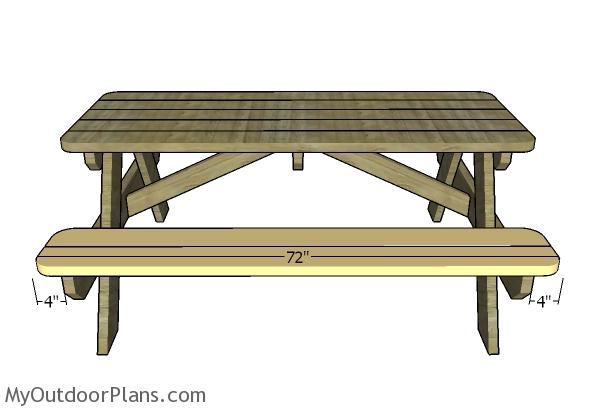
Fitting the seat slats
Last but not least, you need fit the 2×6 seat slats. Center the slats to the frame of the picnic table, drill pilot holes and insert 2 1/2″ screws. Countersink the head of the screws for a neat result.
Last but not least, you need to take care of the finishing touches. Fill the holes with wood putty and let them harden for a few hours. Smooth the surface with 120-220 grit sandpaper and round the exposed edges with a router.
6 foot Picnic Table
Apply a few coats of paint or stain to protect the lumber from the elements and to enhance the look of the 6 foot picnic table.
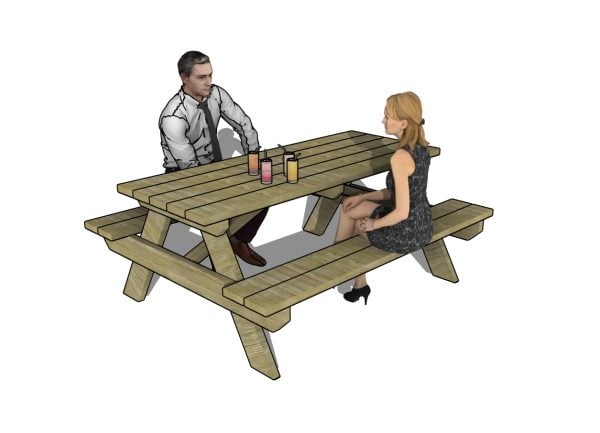
Building a 6 ft picnic table is a fantastic project that brings a ton of benefits. Not only does it provide a sturdy and spacious spot for family gatherings and outdoor meals, but it’s also a great way to hone your woodworking skills. Plus, there’s nothing quite like the satisfaction of enjoying a meal on something you built with your own hands!
How to build a 6 foot picnic table
This picnic table is the ideal project for any garden, as it is easy to build and it the materials don’t cost a fortune. Moreover, if you have a drill, a saw and a sander, you will get the job done in one weekend.
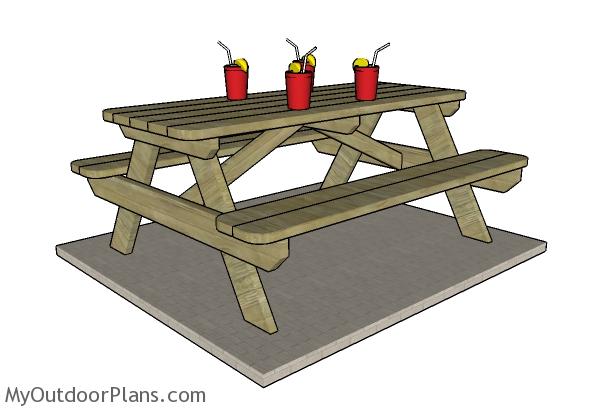
6 foot Picnic Table
Don’t forget to take a look over the rest of my picnic table plans HERE. I have designed lots of woodworking plans so you can add value to your home, save money and have FUN.
This woodworking project was about 6 foot picnic table plans free. If you want to see more outdoor plans, check out the rest of our step by step projects and follow the instructions to obtain a professional result.